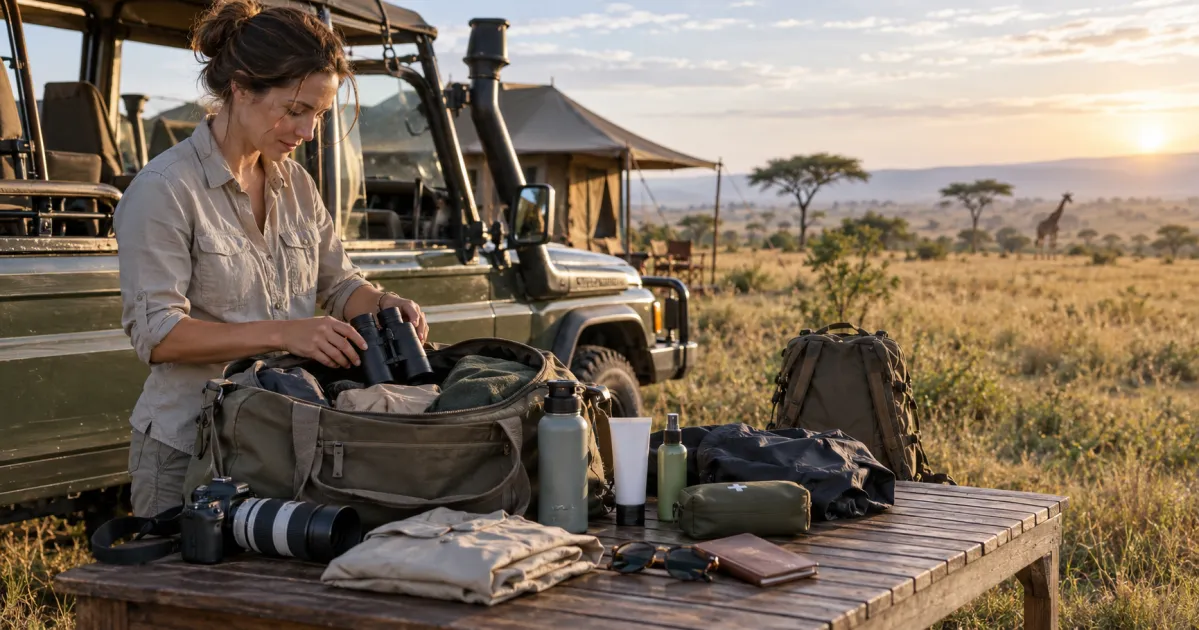
You're standing beside a safari vehicle before sunrise, checking the sky over the Maasai Mara while wondering whether your bag contains enough for the cold, the dust, the sun, and an unexpected shower. Then the pilot reminds you that the bush flight accepts only a soft-sided bag within a strict total allowance, and your carefully packed international wardrobe suddenly becomes a repacking problem.
Knowing what to take on safari in Kenya means choosing items for real situations, not filling a suitcase with generic travel gear. Dawn drives can feel cold, midday can become hot, roads are dusty, lodges may be remote, and wildlife often appears far beyond comfortable unaided viewing. The most useful packing system combines layers, health essentials, compact camera equipment, personal documents, and a bag that works with your itinerary.
This checklist focuses on the gear that earns its space. It also highlights where premium equipment helps, where simpler alternatives work just as well, and which questions to ask an operator before you leave.
1. High-Performance Binoculars
A safari vehicle may bring you close to wildlife, but “close” doesn't always mean detailed. A lion resting in shade, a leopard partly hidden in foliage, or a small bird perched in the distance can remain frustratingly indistinct without your own binoculars. Good optics let you observe animals without asking the driver to move closer or encouraging anyone to disturb their behavior.
An 8x42 binocular is a practical all-round format for Kenya. It offers a broad enough field of view for moving animals while remaining manageable during a bumpy drive. Serious wildlife watchers may consider Swarovski EL or Leica Noctivid models, while the Vortex Viper HD provides a strong middle-ground option. Travelers who aren't ready to invest can start with entry-level Celestron binoculars, provided the image is clear and the focus wheel feels responsive.
Choose comfort before prestige
Test binoculars before buying. Check whether your eyes can see the full image comfortably, whether the focus mechanism is easy to turn, and whether the neck strap stays secure when you lean out to look. A rubberized, anti-slip finish is useful in hot conditions, especially when your hands become sweaty.
Keep a microfiber cloth and lens pen in a small protective case. Dust and fingerprints can quickly reduce contrast, and wiping lenses with clothing can create scratches. Practice focusing at home by switching between nearby and distant objects. On safari, you may have only a few seconds to locate a bird or predator before it disappears.
Practical rule: Keep binoculars attached to your body and ready before the vehicle stops. A pair buried in your main luggage won't help during a brief sighting.
2. Lightweight, Quick-Dry Clothing
Kenya requires clothing that handles two very different parts of the same day. In the Maasai Mara during the dry season, dawn temperatures can fall to 10–14°C, while midday may reach 26–28°C, according to this Kenya safari packing guide. A thick outfit that feels welcome at sunrise can become uncomfortable by lunch, while light clothing alone leaves you cold during the first drive.
Use a layering system rather than packing separate wardrobes. Start with a lightweight long-sleeved shirt, add a fleece or warm jacket, and carry a windproof or waterproof outer layer when rain or open-vehicle exposure is likely. Long sleeves also help with sun and evening insects. Neutral shades such as beige, olive, brown, and muted green are practical because they hide dust and keep the appearance understated.
Pack for laundry, not every day
Quick-dry shirts are more useful than heavy cotton because they can be washed and worn again during a multi-park itinerary. A merino base layer can help regulate temperature and resist odors, while lightweight trousers offer better protection than shorts during dusty drives or walking activities.
A compact clothing group might include:
Long-sleeved shirts: Choose breathable fabrics that dry quickly.
Warm layer: Bring a fleece or light jacket for dawn and higher-altitude areas.
Closed trousers: Select comfortable pants that tolerate dust and repeated wear.
Rain protection: Add a packable waterproof or windproof shell when the forecast or route warrants it.
Sleep layer: Pack something warm enough for cool lodge nights.
Altitude and route matter. Guides note that Kenya's parks extend from near sea level to about 3,000 metres, so a Mara fly-in and a cooler Aberdare or Laikipia stay shouldn't receive exactly the same clothing plan, as explained in this Kenya packing guide for different safari profiles. Explola's East Africa travel tips for first-time visitors also support a practical combination of long sleeves, neutral clothing, sun protection, and a light day bag.
3. Premium Sunscreen SPF 50+
Sun protection is easy to underestimate when the vehicle is moving and the air feels cool. You can spend hours exposed to direct sunlight without noticing the heat, particularly when the vehicle's open sides create a breeze. Apply a broad-spectrum SPF 50+ sunscreen before the morning drive and keep a smaller format available for reapplication.
Choose a formula you'll use generously. La Roche-Posay Anthelios can suit travelers with sensitive skin, while Neutrogena Ultra Sheer is a familiar pre-trip option. Mineral products such as Blue Lizard or Badger may appeal to travelers who prefer those formulations. A sunscreen stick is especially useful for ears, the bridge of the nose, hair partings, and other areas people routinely miss.
Protect more than your face
Pack a dedicated facial sunscreen if sweat and rich formulas tend to cause breakouts. Add SPF lip balm, because dry wind and sun can leave lips sore long before the rest of your skin feels uncomfortable. If your itinerary includes a coastal extension or lodge swimming, choose a product that matches your environmental preferences. Travelers interested in different textures can compare options through this guide to understanding gel sunscreens.
Don't rely on a lodge shop for a particular product or formulation. Remote properties may offer basic toiletries, but your preferred sunscreen, lip protection, or sensitive-skin formula may not be available. Keep sunscreen in a leak-resistant pouch inside your day bag, and place it where you can reach it without unpacking your camera equipment.
The most effective sunscreen is the one you apply consistently. Cover exposed skin before leaving, pay attention to the back of your neck and hands, and reapply after swimming or heavy sweating. Your safari clothing reduces exposure, but it doesn't replace sunscreen on uncovered areas.
4. Lightweight Day Backpack
Your main safari bag should stay at the lodge or camp. During a game drive, you need a smaller day backpack for binoculars, water, sunscreen, medication, batteries, a rain layer, and personal essentials. A compact pack keeps the vehicle seat clear and gives you quick access without opening your main luggage in a dusty environment.
A camera-focused option such as the Lowepro Whistler can protect delicate equipment, while the Peak Design Everyday Backpack offers flexible organization. For travelers carrying less camera gear, the Osprey Daylite Plus or Deuter Speed Lite provides a lighter hiking-style solution. A budget utility pack can work if its shoulder straps are comfortable and its fabric resists light rain.
Match the bag to your seat
A pack that looks excellent in a shop can be awkward inside a safari vehicle. Test it with the items you'll carry, then place it on the floor, between seats, or beneath a bench. A hip belt helps on walking activities, but it can become unnecessary bulk if your pack remains in the vehicle most of the time.
Organize the interior by access priority:
Fast-access pocket: Keep sunscreen, lip balm, tissues, and repellent here.
Protected compartment: Store camera bodies, lenses, and memory cards away from loose dust.
Bottom section: Place a light jacket or rain shell beneath items you may need quickly.
Side pocket: Reserve it for a secure water bottle that won't leak onto electronics.
A microfiber cloth inside the camera compartment can save a dusty lens during the afternoon. Packing cubes are useful for small accessories, but don't overfill the backpack. You want a bag you can lift easily, place securely, and open without spilling its contents when the vehicle stops suddenly.
5. High-Quality Camera With Telephoto Lens
A smartphone can record the scenery and memorable moments, but wildlife often demands more reach. A telephoto lens helps you frame animals from a respectful distance, isolate a subject against grass, and capture behavior that would appear tiny in a standard travel photograph.
Professional users may choose a Canon EOS R5 with a long zoom, a Sony A7 IV with a 70–200 mm lens, or a Nikon Z9 system. An entry-level Canon EOS R50 paired with a suitable telephoto lens can be more approachable for a first dedicated wildlife trip. Casual photographers may prefer a modern smartphone, especially if they value simplicity over manual control.
Make the camera serve the itinerary
Don't buy the largest system just because the safari feels like a once-in-a-lifetime opportunity. A heavy camera can become tiring, and a complex setup won't help if you haven't practiced autofocus, exposure, and lens changes. Rent equipment if you don't expect to use it regularly, but arrange it early enough to test the exact body and lens combination.
Dust protection matters more than cosmetic perfection. Use a weather-resistant camera bag, keep a rain cover accessible, and avoid changing lenses unnecessarily inside the vehicle. Bring spare batteries, memory cards, charging cables, and a way to back up important images. A controlled lodge room is a better place to clean equipment than the open vehicle.
The best safari camera is the one you can operate quietly and quickly while watching the animal, not the one with the longest specification sheet.
If your primary interest is wildlife photography, review the route and habitat before choosing lenses. The Maasai Mara National Reserve can produce varied opportunities across open plains and denser cover, so ask the operator how much time you'll spend in vehicles, whether photography-focused guiding is available, and how much equipment the vehicle can accommodate.
6. Malaria Prevention Medication
Medication planning belongs on your packing list before clothing. Malaria risk varies by location and altitude, and a safari may combine lower-lying wildlife areas with cities, highlands, or a coastal extension. A travel-health professional can assess your complete route, medical history, existing medication, allergies, and the prevention option that suits you.
Commonly discussed antimalarial options include atovaquone-proguanil, doxycycline, and mefloquine, but travelers shouldn't choose between them from a packing blog. Each has different dosing considerations, side effects, contraindications, and continuation requirements. Obtain the prescription before departure and carry it in its original labeled packaging.
Build a medication routine
Take prevention medication exactly as prescribed and keep the schedule consistent. A phone reminder can help when early game drives, long transfers, and time-zone changes disrupt normal routines. Store tablets in your carry-on rather than leaving them in checked luggage, and keep a copy of the prescription or medication details with your travel documents.
Malaria prevention also includes reducing bites. Long sleeves, closed shoes, screened rooms, bed nets where provided, and repellent all work alongside medication. Fever during or after travel needs prompt medical attention, even if you've taken preventive tablets.
Explola's Kenya safari guide to parks, costs, and planning can help you understand how a multi-park itinerary affects preparation, but medical advice should come from a qualified clinician familiar with travel medicine. Ask that clinician about every stop, including airport overnights and post-safari beach stays.
7. Insect Repellent
Repellent is one of the few items you'll use repeatedly, especially around dawn, dusk, vegetation, and lodge gardens. A DEET-based product provides a practical barrier against mosquitoes and other biting insects. Choose a concentration and application schedule that match your clinician's advice and the product label, rather than assuming the strongest formula is automatically best for every traveler.
Apply repellent to exposed skin such as the neck, wrists, ankles, and areas behind the ears. Don't spray it directly onto your face or eyes. Put a small amount on your hands first, then apply carefully around the face while avoiding the eyes and lips.
Combine skin and fabric protection
Repellent works better as part of a broader system. Wear lightweight long sleeves and trousers during early and late drives, and consider treating suitable clothing with permethrin before travel if the product is approved for that use. Sunscreen usually goes on first, followed by repellent, unless the product directions say otherwise.
Keep a bottle in the day bag and another with your toiletries. A leaking container can damage camera straps, clothing, and bag linings, so place each bottle in a sealed pouch. Don't assume a remote lodge will carry the concentration or brand you prefer.
The most useful approach is consistent rather than dramatic. Apply before exposure, reapply according to the label, and check ankles, cuffs, and neckline after a drive. Repellent won't replace antimalarial medication or appropriate clothing, and medication won't stop every bite, so use both layers of protection.
8. Lightweight Compact Binocular-Compatible Camera Tripod
A tripod can improve sharpness, but it isn't automatically a smart safari purchase. Full-size models take space, slow down spontaneous shooting, and can be awkward inside a shared vehicle. For most travelers, a compact support system, beanbag, or vehicle-friendly stabilizer is more practical than carrying a studio-style tripod into the bush.
A travel tripod such as the Manfrotto Befree can suit smaller mirrorless systems. A carbon-fiber Gitzo model provides greater support for heavier equipment, while a Sirui travel tripod offers a lower-cost alternative. A flexible mini tripod may help with creative angles, but it won't replace stable support for every telephoto setup.
Choose support around your shooting style
If you're photographing from a vehicle, a beanbag placed on the window ledge or seat often provides faster support than extending tripod legs. Some travelers carry an empty support bag and fill it with suitable material at camp, reducing bulk during transfers. For walking or dedicated photography outings, a compact tripod with a removable center column can be easier to position close to the vehicle.
Before departure, practice attaching the camera, balancing the lens, and adjusting the ball head. Loose knobs and unfamiliar quick-release plates create delays when an animal appears. Image stabilization can still help, but test how your camera and lens behave on a tripod rather than assuming one setting suits every system.
Secure the tripod when driving. A loose piece of equipment can slide across the vehicle, strike another passenger's bag, or become damaged on rough roads. If you aren't planning deliberate low-light or long-exposure work, leave the tripod behind and use a beanbag or the vehicle's built-in support instead.
9. Personal First Aid Kit and Medications
A compact first aid kit gives you control over minor problems when the nearest medical facility isn't convenient. It doesn't need to resemble an expedition clinic. It should cover your personal needs, common travel discomforts, and the small injuries that can occur during transfers, walks, or dusty game drives.
Pack prescription medication in original labeled containers and keep it with you in your carry-on. Add copies of prescriptions, allergy information, and relevant medical details. Your kit might include plasters, antiseptic supplies, pain relief, antihistamine, stomach remedies, oral rehydration products, blister care, and any personal treatment items your clinician recommends.
Keep it accessible and waterproof
Don't bury medical supplies under clothing in your main duffel. Use a clearly labeled waterproof pouch in your day backpack, especially for medication you'll need during a long drive. Separate daily medication from emergency supplies so you can find it quickly without emptying the entire kit.
A custom kit is often better than a large preassembled pack because it reflects your health needs and itinerary. Include enough supplies for the full route, especially if you're combining Kenya with another destination or spending time away from large towns. Check expiration dates before departure and avoid transferring tablets into unmarked containers.
Some lodges have basic medical support, but capabilities and distances vary. Ask the operator what assistance exists at each property, whether the route includes remote camps, and how emergency transport is handled. For a broader preparation framework, this guide to building a camping first aid kit can help you identify gaps, but your travel clinician should make the final call on medicines.
10. Reusable Water Bottle and Hydration System
A reusable bottle earns space because game drives can last for hours and thirst isn't always a reliable early warning. Choose a leak-resistant bottle that fits the vehicle's holders or your backpack's side pocket. Insulation is helpful if you prefer cool water, but a lightweight non-insulated bottle may be the better choice when every gram matters.
Lodges generally help guests access drinking water, yet the exact refill arrangement depends on the property and itinerary. Ask whether the vehicle carries reserve water and whether you can refill during a long drive. A wide-mouth bottle is easier to clean, while a narrow-mouth design may reduce spills over camera equipment.
Make hydration easy to maintain
Fill the bottle before departure and keep it within reach rather than at the bottom of your bag. Electrolyte sachets or tablets can be useful after sweating, but they shouldn't replace ordinary water or medical advice. A cooling towel can also provide relief during hot periods, though it adds another item to manage.
Hydration habits should fit the drive. Drink regularly instead of waiting until you feel severely thirsty, and moderate intake just before a remote stretch if toilet access will be limited. Check with the operator about bathroom stops before leaving camp, particularly on full-day excursions.
A collapsible bottle is useful as a backup because it takes little space when empty. It can also help on a road itinerary where refill points are predictable. For a fly-in safari, choose the smallest durable system that meets your needs and avoid carrying multiple rigid bottles that consume valuable bag volume.
10 Essential Safari Gear Comparison
Item | Core features | Quality (★) | Price & value (💰) | Target & USP (👥 ✨ 🏆) |
|---|---|---|---|---|
High-Performance Binoculars | 8x/10x42, fully multi-coated, close-focus, weather-sealed | ★★★★★, guide-grade clarity | 💰 $300–$1,500, long-term value | 👥 Photographers/guides · ✨enhances spotting · 🏆pro optics |
Lightweight, Quick-Dry Clothing | Moisture-wicking, UPF50+, wrinkle-resistant, earth-tones | ★★★★, fast-dry comfort | 💰 $60–$150/item, packable value | 👥 All travelers · ✨layerable/sun protection · 🏆reduces luggage |
Premium Sunscreen (SPF 50+) | Broad-spectrum SPF50+, reef-safe, water-resistant, matte/mineral options | ★★★★, essential protection | 💰 $10–$40/tube, premium vs lodge markup | 👥 Health-conscious travelers · ✨reef-safe/matte finish · 🏆prevents trip disruption |
Lightweight Day Backpack (20–30L) | 20–30L, padded camera compartment, ventilated back, rain cover | ★★★★, ergonomic, camera-ready | 💰 $50–$400, basic to pro models | 👥 Day-trippers/photogs · ✨camera protection & comfort · 🏆vehicle-friendly size |
High-Quality Camera + Telephoto Lens | 200–400mm+, fast AF, weather-sealed, 4K/20MP+ sensor | ★★★★★, professional imaging | 💰 $2,000–$6,000+, high investment | 👥 Enthusiast/pro photographers · ✨telephoto reach & AF · 🏆professional results |
Malaria Prevention Medication | Malarone / Doxycycline / Mefloquine regimens, timing guidelines | ★★★★★, trip-critical prophylaxis | 💰 $50–$200+ per course, consult specialist | 👥 All travelers to risk areas · ✨medical necessity · 🏆prevents serious illness |
Insect Repellent (DEET-based) | 20–30% DEET, lotion/spray, 4–6h duration, clothing treatment complement | ★★★★, CDC‑recommended efficacy | 💰 $5–$12/bottle, economical | 👥 All travelers · ✨broad vector protection · 🏆complements antimalarial |
Lightweight Compact Tripod | Folded 40–50cm, 1–2kg, 3–5kg load, ball/pan head | ★★★★, stabilizes telephotos | 💰 $60–$500, aluminum → carbon fiber | 👥 Photographers · ✨vehicle-stable support · 🏆reduces hand tremor |
Personal First Aid Kit & Meds | Antibiotic ointment, blister care, loperamide, antihistamine, pain relief | ★★★★, essential self-care | 💰 $30–$125, kit vs clinic fees | 👥 All travelers · ✨remote self-treatment · 🏆prevents trip disruption |
Reusable Water Bottle & Hydration System | 2–3L or 2×1L, vacuum-insulated, wide-mouth, leak-proof | ★★★★, critical for safety | 💰 $20–$130, lightweight → premium insulation | 👥 All travelers · ✨all-day hydration & waste reduction · 🏆prevents dehydration |
Ready for the Wild
The strongest Kenya safari packing list isn't the longest one. It is the one that keeps you warm at dawn, comfortable in the midday sun, protected from insects, prepared for minor health problems, and ready to observe wildlife without constant repacking. Every item should solve a specific problem, and every bulky item should justify the space it takes.
Start with your itinerary rather than your shopping list. A road safari gives you more flexibility with luggage, while internal bush flights impose a 15 kg total allowance per passenger, commonly including checked and hand luggage, according to this Kenya bush-flight luggage guide. Operators commonly require a soft-sided duffel, and camera bags or daypacks may count toward the same limit, so confirm the exact policy before you buy a large hard-shell suitcase.
Your route should also shape your layers. A Mara itinerary with early vehicle departures needs warm, packable clothing that can be removed as the day warms. A higher, colder region calls for a more dependable insulating layer. A safari followed by the coast needs clothing that transitions from dusty drives to relaxed evenings without forcing you to bring a second full wardrobe.
Check the operator's real inclusions
Explola can help you compare operators, but ask each one specific packing questions before booking or flying:
Baggage policy: Confirm the aircraft allowance, whether hand luggage is included, and whether soft duffel dimensions are restricted.
Vehicle setup: Ask whether the vehicle has camera supports, charging points, drinking water, and room for a day backpack.
Laundry access: Find out whether laundry is available along the route, and whether delicate technical clothing is accepted.
Photography support: Ask whether the guide is comfortable with wildlife photography and whether private vehicles or dedicated photography departures are available.
Medical logistics: Check how far camps are from medical facilities and what emergency support the operator coordinates.
Don't pack hard-shell luggage for a bush-flight itinerary unless the airline explicitly confirms it will accept it. Don't bring several pairs of heavy shoes when one reliable closed pair and a lighter lodge option can cover the route. Don't treat camera accessories as free extras, because lenses, batteries, bags, and support equipment can consume the same allowance as clothing.
Your carry-on should contain the items you can't afford to lose, including passports, prescriptions, essential medication, documents, valuables, and critical camera equipment. Keep digital copies of reservations, insurance details, emergency contacts, and operator communications where you can access them offline.
Finally, test the complete system at home. Wear the shoes, adjust the backpack, attach the binoculars, handle the camera, and pack the duffel as though you're leaving for the airport. If the bag is already inconvenient before the safari begins, it won't become easier beside a dusty airstrip.
A well-planned kit leaves room for the experience itself. You won't need to think about every item once the vehicle moves into the plains, but you'll notice immediately when your layers work, your optics are ready, your water is accessible, and your documents are secure. That preparation lets you concentrate on tracks in the road, birds in the canopy, and the sudden appearance of an animal you came to Kenya to see.
Use Explola to compare verified Kenya safari operators, review day-by-day itineraries and inclusions, and ask direct questions about baggage, vehicle gear, laundry, and health logistics. Build a shortlist around your route and packing needs, then request quotes directly so your final safari fits both your budget and the equipment you plan to bring.

Daniel writes for the Explola blog, where he covers African safari destinations, wildlife, travel trends, and practical trip planning. His work is centered on making safari travel easier to understand, compare, and plan.
Get Safari Tips & Destination Guides
Join our newsletter for exclusive travel tips, wildlife insights, and safari planning advice.